Table of Contents
Latch Systems Motion Detector User Manual
Latch Systems Motion Detector User Manual
(2AK5B7804)

Motion Detector
Quick Start Guide 2024
A. Welcome!
Thank you for choosing DOOR products!
At DOOR we’re reinventing how we live. Through the foundation of access control business, we serve the Honest Day’s Worker—the builder, property manager, contractor, driver, and in-home service provider—that keeps the world running smoothly.
These individuals are the cornerstone of vital services such as housing, transportation, cleaning, dog walking, and more. They deserve access to technology and products that empower them to provide top-notch experiences to their customers while maximizing the economic benefits of their hard work.
DOOR is proud to stand by and innovate for our Honest Day’s Worker every day!
B. Before You Begin
Please note the following user guide icons:


This device connects to the internet via DOOR Field Station, and it does not connect directly to your WiFi or local network.
In order for remote access to the device from the app, and for full functionality, a DOOR Field Station is required.
This guide assumes the DOOR App has been installed on your smartphone and a Field Station is installed and online.
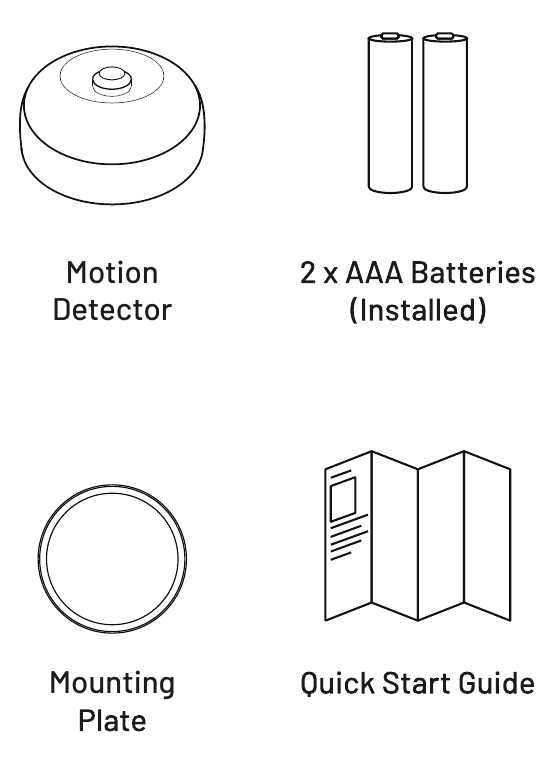
C. In the Kit

D. Required Items
The following items may be required:

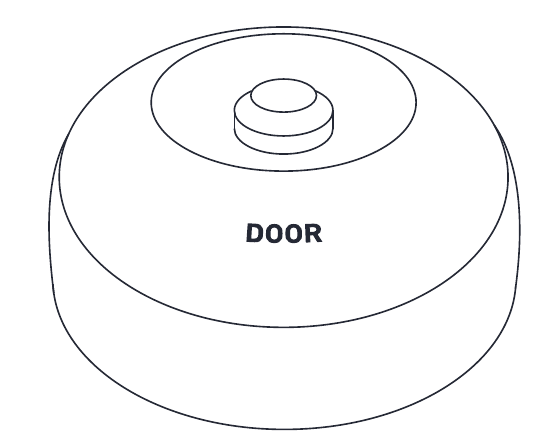
E. Get to Know Your Device


LED Behaviors


F. Add Device To DOOR App
If you are new to DOOR, please install the DOOR App on your phone, if you have not already.

Open the app and tap Sign up for an account. You will be required to provide a username and a password. Follow the instructions, to set up a new account. Allow notifications, when prompted. Login to the app using your new username and password. If you already have an account, please ensure you log in using that one.
Ensure you install the Field Station within the app before proceeding to install the Motion Detector.
- In the Home screen of the app, tap on the card located in the top right.

2.Tap on the “Add device” icon.

3. Approve access to your phone’s camera, if requested. A viewfinder will be shown on the app.

4.Hold the phone over the OR code so that the code appearsin the viewfinder. If successful, the next steps will be displayed.
5.Follow the on-screen instructions in the DOOR App, which will guide you step by step.
G.Power Up
Turn on the Motion Detector by briefly pressing the SET button, until you see the LED flash red then green.

H. Installation
Sensor Location Considerations:
Before installing your Motion Detector, please consider the following:
- Passive-Infrared (PIR) Motion Detectors such as your Motion Detector detect movement within a specific area by sensing the infrared energy emitted from a body, causing a temperature change, as it moves across the sensor’s field of view.
- The Motion Detector is intended for indoor use. As the sensor uses infrared sensing technology, ambient temperature and the temperature of the detection target (such as people) is a factor. Hot, outdoor environments, even if under cover (such as a car port) will result in undesired behaviors such as false alarms or failure to detect motion.
- Do not use the sensor in extremely hot or steamy environments, such as in a boiler room or near a sauna or hot tub.
- Do not aim your Motion Detector at, or place the sensor near sources of heat, such as space heaters, or near sources of rapid temperature change, such as heating or cooling grilles or registers.
- Do not aim your Motion Detector at windows, fireplaces, or other sources of light. For example, at night, lights from a vehicle shining through a window directly into the Door Motion Detector may cause a false alert.
- Mount the Motion Detector to a rigid surface, free of vibration.
- Placement of the Motion Detector in high traffic areas will reduce the life of the batteries.
- Pets such as cats and dogs can set off the Motion Detector. If you have pets and are using the sensor for security applications, consider wall-mounting your sensor, which provides more control over the detection region.
- The Motion Detector best detects motion moving across its field of view, as opposed to moving directly towards it.
- The Motion Detector has a 360° cone of coverage (viewed from directly below, sensor facing down), with a 120° coverage profile (viewed from the side of the sensor). Detection range is approximately 20 feet (about 6 meters).
- If mounting your Motion Detector on the ceiling, the ceiling height should be no more than 13 feet (about 4 meters).
- If wall-mounting your Motion Detector, the suggested mounting height is approximately 5 feet (about 1.5 meters).
- The Motion Detector has an integral magnet that allows for mounting to the metal mounting plate or to a metal surface. The metal plate has mounting tape, that allows it to be secured to a suitable surface.
- We recommend you test the proposed location of your Motion Detector before permanently installing it. This can be easily done with painter’s tape, by taping the mounting plate to the proposed location, allowing for testing the sensor, as explained later.
- The Motion Detector does not have pet immunity features. One method to prevent false alerts caused by pets includes avoiding the use of this sensor in areas the pets may occupy while the sensor is armed. Wall-mounting your sensor higher on the wall, so that the coverage ‘cone’ does not include the floor of the room, is another method. Adjusting the Door Motion Detector’s sensitivity to low may help (but it may slow response time, or prevent operation entirely). Large dogs and/or pets that climb up on furniture will likely cause a false alert, if in the coverage region of your Motion Detector. A trial & error process of testing the proposed sensor location and settings, with your pet, is recommended.

The mounting tape is extremely adhesive and can be very difficult to remove later without damage to the surface (removing paint, even drywall). Use care when installing the mounting plate on delicate surfaces.
Install and test the Door Motion Detector:
1. If mounting the Motion Detector to a metal surface, you can do so at this time. Otherwise, you may either secure the mounting plate to the surface, using painter’s tape (to test the location first), or you can secure the mounting plate to the surface. Do so by first cleaning the installation area, using rubbing alcohol or similar to remove all dirt, oil or grease from the mounting surface. Remove the backing from the mounting tape, then place the mounting plate at the desired location, tape side to the mounting surface. Press and hold for at least 6 seconds.
2. Place the Motion Detector on the mounting plate. Ensure it has a good magnetic connection to the plate.
3. Next, test the sensor. It is very important that you test the sensor, as realistically as possible, to ensure it works as required for your application. With your phone in-hand, using the app, refer to the Motion Detector status as you walk through the coverage area. You may need to adjust the location of the sensor and/or sensitivity.
4. When the sensor responds as desired, if temporarily installed, you may permanently install it as noted in step 1.

Please note! A Motion Detector is not a guarantee of security or protection against intrusion into your home or business. As noted, Motion Detector can be prone to false alarms under certain conditions, and they may also not respond as desired under certain conditions.
I. Contact Us
DOOR
Support
Door Technologies, Inc.
1220 N Price Rd
STE2
Olivette, MO 63132
Copyright © 2024
Door Technologies, Inc.
All rights reserved.
To install and configure devices download the DOOR App:

Latch Systems Motion Detector User Manual